After the previous tutorials [STILL IN ITALIAN LANGUAGE... sorry about that - may Google Traslate be with you :-) ] :
(Automatic local reconstruction of high definition, tiled historical maps hosted by the Archivio di Stato di Torino, >>ONLY FOR LOCAL AND PRIVATE, NON COMMERCIAL USE<<)
(a technique to accurately georeference historical maps, and then show them as Google Earth transparent kml overlays)
now the goal is to use the powerful software architecture beneath the Google cylindrical projection rendering engine to populate our cities with historical images (potentially any image, actually). This has been already done by others, but as far as I can see (even in Google Developer examples), only using static overlays or a big altered 'panorama' that is processed integrally, and then rendered in a single, processor-intensive operation. This is not the way Google Street View is supposed to work.
With this other technique we will have a panorama totally integrated with the 'original' one, processing 'on demand' only the required set of tiles, view by view, and the result will be perfect at any zoom level or heading.
Everything will be done in Windows, using only free and/or open source software, with some components developed by me to complete the toolchain.
The process requires 4 steps:STEP 1) Grab the whole set of tiles that Google Streets uses to show the panorama, at every zoom level; rebuild the original panorama as shot by the Google Car (an interesting image in itself), keeping track of any integration done to the panorama via markers on a bidimensional map
STEP 2) Overlay new images on the reconstructed panorama, taking into account the distortions caused by the cylindrical projection
STEP 3) Slice the modified panorama in tiles again, to feed Google Streets View with these ones, at any zoom level
STEP 4) Enjoy the result in a custom web page...
__________________
IMPORTANT NOTE - A continuous and reliable internet connection is required.
First of all install the following packages (if not yet installed):
---> 0 . Google Chrome: https://www.google.com/intl/it/chrome/browser/
(Un)fortunately the rendering in the page I wrote does not work in Internet Explorer [I use the HTML5 FileReader object, not yet implemented in IE. Maybe I will develop a multi-browser version, in the future.]
---> 1 . GIMP: download from SourceForge
---> 2 . Quantum GIS: http://qgis.org/downloads/QGIS-OSGeo4W-1.8.0-2-Setup.exe
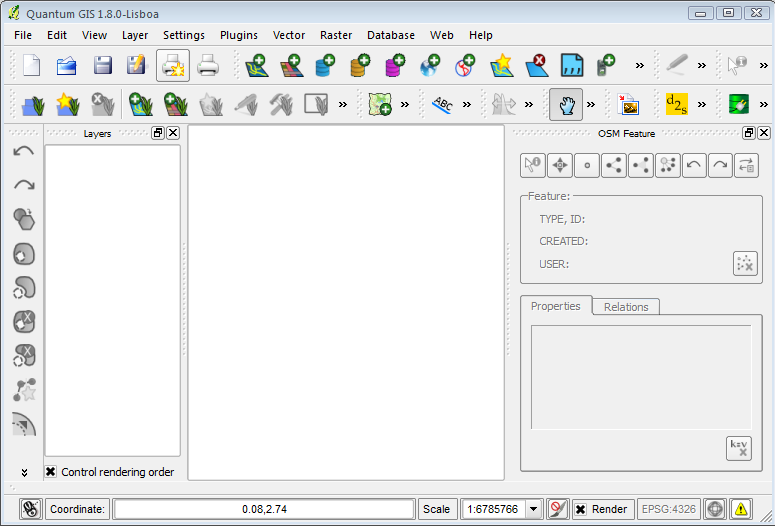
After having installed it, launch QuantumGIS, and from the Plugins menu choose the item 'Fetch Python Plugins':
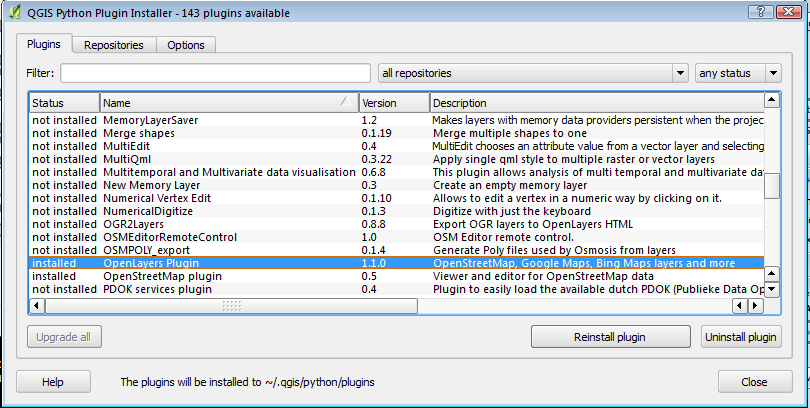
It will connect to its repositories, and after a while it will show a LONG list with all the installable plugins. Order them by name clicking on the column 'Name', and click on 'OpenLayers plugin'.
Then click on 'Install plugin' (here it is not visible because I had previously installed it... but it will be in place of the 'reinstall plugin' button)
Then select Plugins/Manage Plugins, and verify that the 'Georeferencer GDAL' and 'OpenLayers Plugin' are checked and marked as installed.
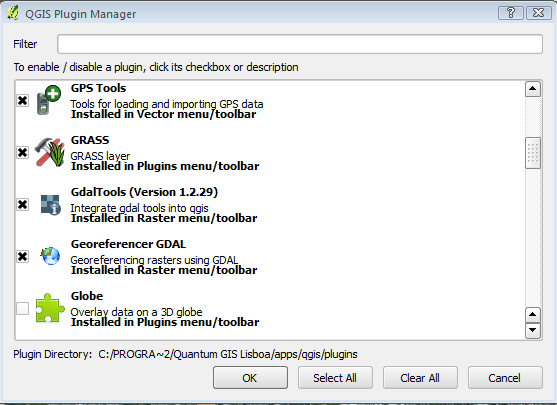
At the end, in the 'Plugins' menu there will be a new item: 'OpenLayers Plugin', and in the 'Raster' menu there will be a 'Georeferencer' item.
---> 3 . ImageMagick: http://www.imagemagick.org
---> 4 . My program... TileMagickByMQC.zip - The installer is in a .zip file (decompress it and launch setup.exe).
If you already have a previous version installed, it is better to uninstall it from control panel first.
This version has a checkbox named 'DEBUG' added. To enable debug traces it is enough to put a check in the box; two debug files will be created during the execution, in the same directory of the index file, with extension .trace and .DEBUG; the first will contain an execution log; the second will contain many system information (OS version, imagemagick version, etc.). If you will need to contact me to solve any issue I will ask for them, to help me debug the application... The .DEBUG file MAY contain information that you could consider sensible (like user name, IP address, etc); it is a text file, please review it before sending anything to me, blanking any info you don't want to appear there...
The software is written in C# and uses .net 4.0; the setup will probably connect to the Internet to download from Microsoft any required component not already present in the system.
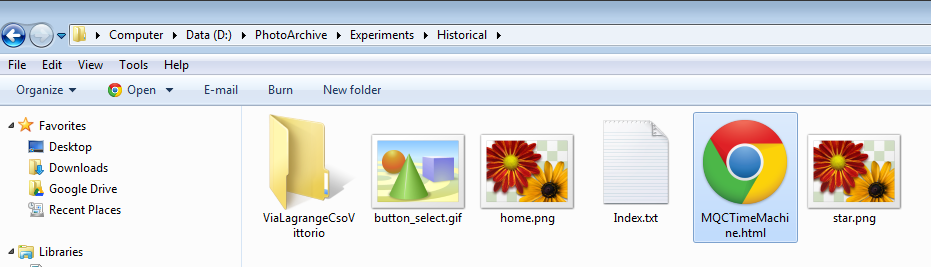
---> 5 . my custom html page: MQCTimeMachine_html.zip (includes css, javascript, etc) to use to show the result. It is inside a zip file together with some little images it uses; it has to be unzipped in every root folder containing a panorama index file (This will be understandable in moments...).
(A warning notice... we will deal with MANY small files, so we will try to keep the disk as clean as possible. In the root folder where we will unzip the html page, we will create the folders where all modified panoramas will reside. The master index will be created in the root folder. It is not mandatory, but clean and easy.)
---> 6 . An optional BIG zip (200MB) a bit out of date (revision 0), with the whole example seen in this page, including qgis and gimp projects: Historical_example.zip . Download it only if you really get lost in the process...
__________________
STEP 1
(I did the same steps while writing this tutorial... so I hope not to have skipped anything...)
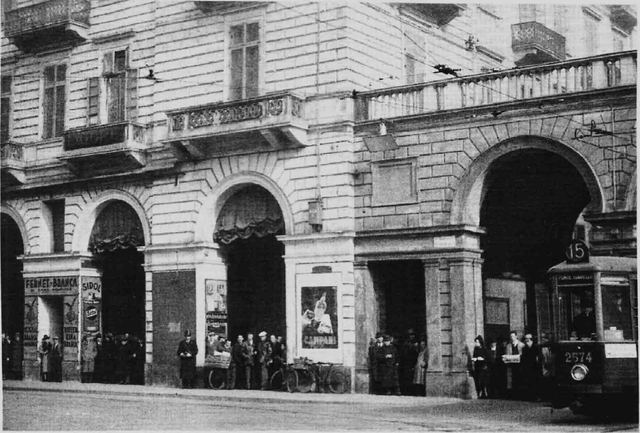
Find a 'suitable' photo. This could be really subjective. You will have the best results with frontal views of a building, not too 'panoramic' (to speed up the graphic manipulation) and with the highest resolution possible (for an historical image). Nonetheless, any photo taken at street level, with a heading comparable with the Street View one, could do. Take for example this one (Torino, Via Lagrange next to Corso Vittorio, during the training for a WWII air raid):
Then find the most similar framing in Google Maps / Street View:
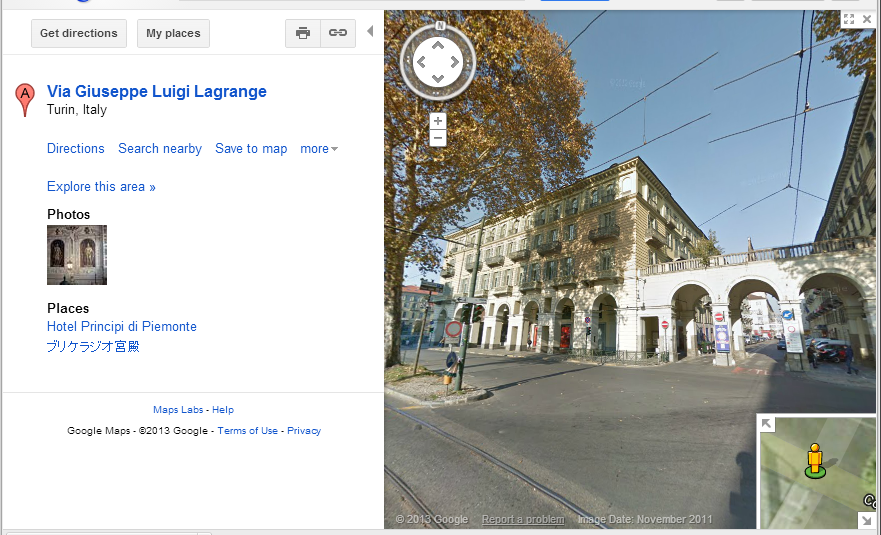
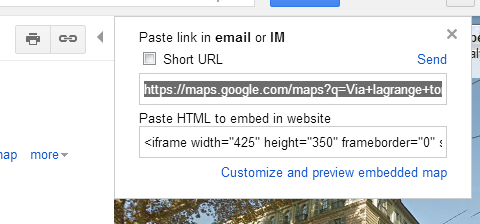
Click on the 'link' icon, and copy the resulting URL (ctrl-c in Chrome):
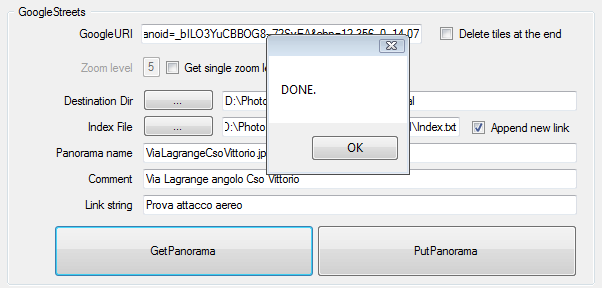
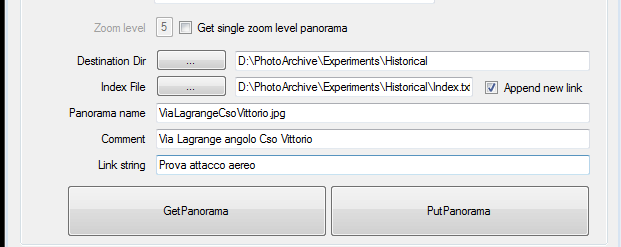
Then launch my StreetTileMagick.exe, and fill the following fields in the GoogleStreets section (forget the AST section, it belongs to another tutorial):
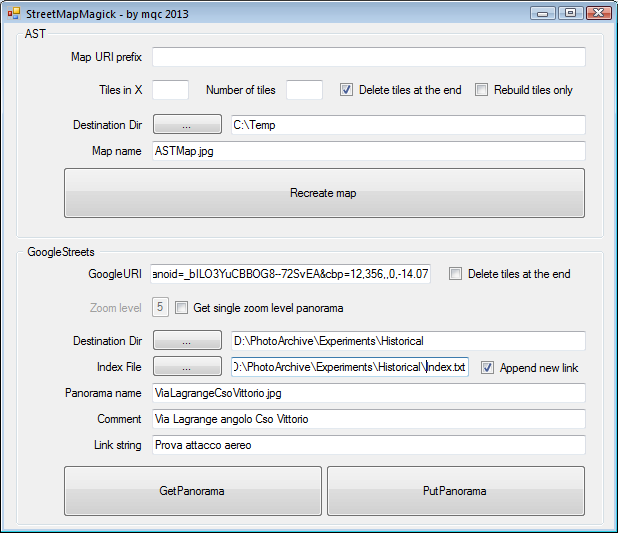
- Google URI: Paste the link just copied from Google Streets
- Delete tiles at the end: You can put the check here, because the tiles downloaded from Google to recreate the original panorama will be recreated from the modified one. I prefer not to, because if you keep the tiles you can test if everything is working BEFORE modifying the panorama...
- Zoom level and Get single zoom level panorama: If the checkbox is NOT checked, every zoom level will be rebuilt (default). There may be needs to get only a single zoom level (sometimes I just like to see the cylindrical projection of a place :-) ).
- Destination Dir: Choose your 'base folder', typically where you previously extracted my 'viewer' html page. Inside this directory there will be the index file, and another folder containing the reconstructed panorama and tiles, created during the execution.
- Index File: Choose the appropriate name for the index file. This will be a master index of all the 'integrations' done inside the same 'epoch' (if you need more than one historical image for a single building, you will need an index file for each image). The Append new link check is important... if the check is not present THE INDEX FILE WILL BE OVERWRITTEN!!!!
>>> Please, backup the index file often... best if before doing any new panorama. <<<
- Panorama name: The 'base' name for the reconstructed panoramas (the actual names will be prepended with a number from 0 to 5, representing the zoom level)
- Comment: This field will be converted in a row inside the index file to make it more readable, in case you will want to modify it by hand.
- Link string: This text will be shown as a custom link in the standard street view, to be clicked to access the modified view.
Then click on the button 'GetPanorama'... and wait. The software will contact the Google Tile Server, and request all the tiles needed for each zoom level (in this example asking for 'panoid=_bILO3YuCBBOG8--72SvEA', uinquely identifiying the chosen location panorama on the planet).
At the end the 'DONE.' message will appear...
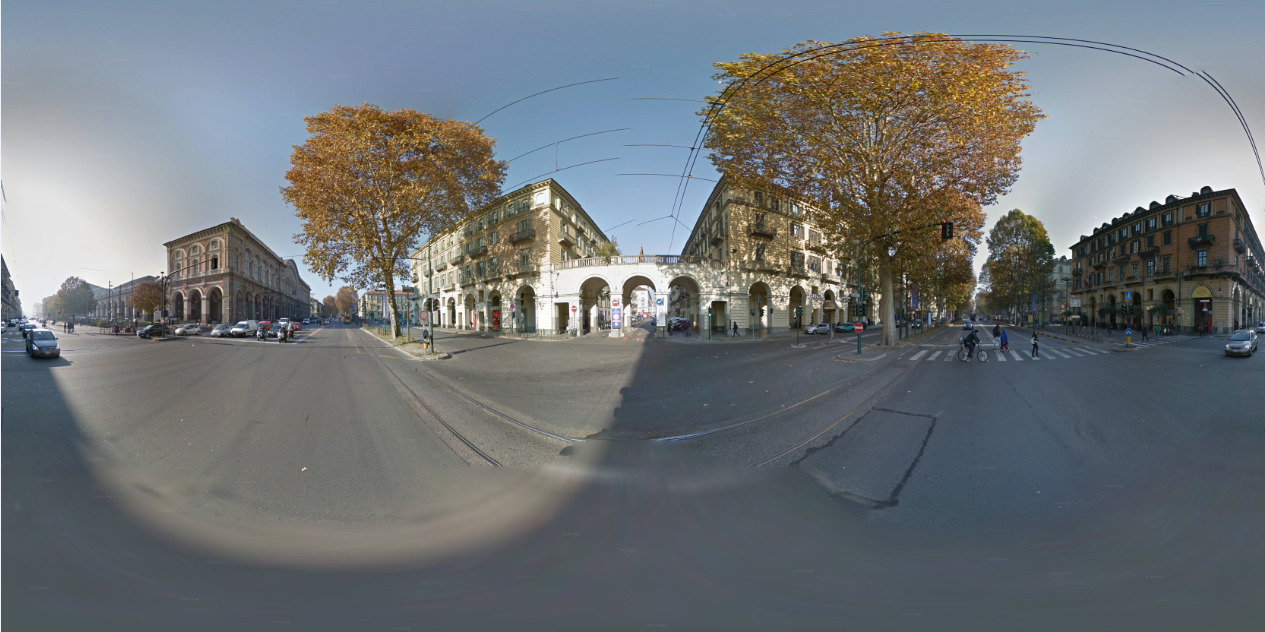
and inside the newly created directory having the same name as the panorama we will find 474 new files (circa 20MB):

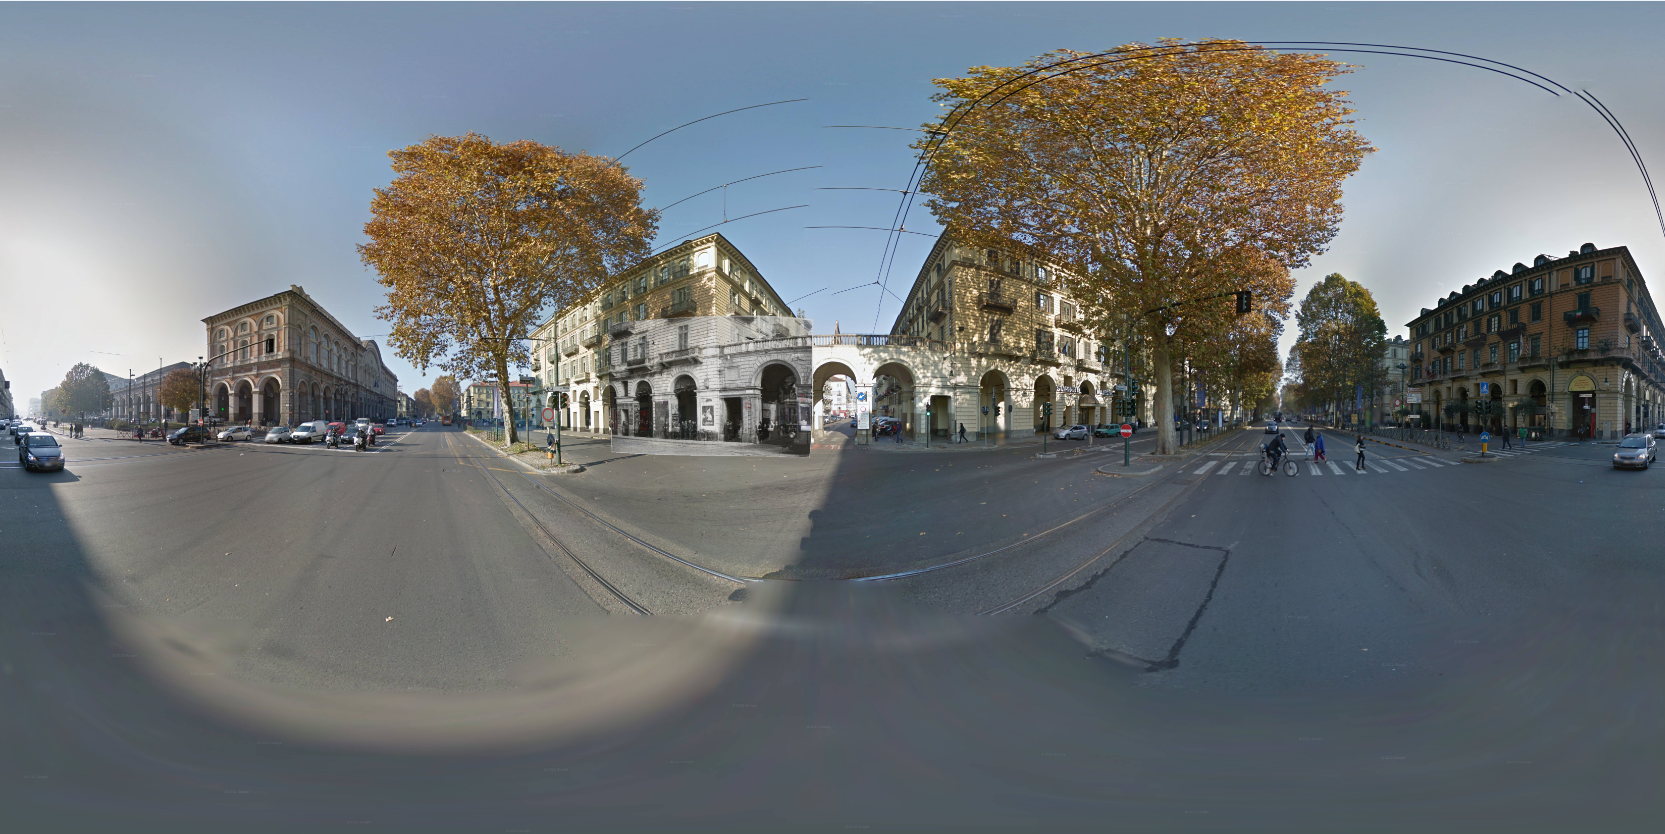
The files beginning with "PanoTile" are the tiles used to reconstruct the panoramas. We need the first 6 files, the actual panoramas - for example for the zoom level 5 we have this one - 5_ViaLagrangeCsoVittorio.jpg :
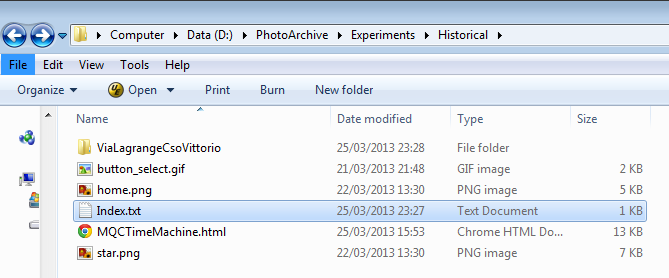
In the base directory we can find the index.txt file:
Let's keep the StreetTileMagick.exe program open, because if we close it we will have to input some data again later.
__________________
STEP 2
Now we have to overlap the historical image to the panoramas. Actually the used ones are 3 out of 6, I cannot say why... Google has tiles for zoom levels 0, 1 and 2, but Street View asks only for zoom levels 3, 4 and 5.
I could not find any free software to 'stir' the photo on a cylindical projection... except one. I used in another tutorial (only in Italian by now... sorry) a GIS software to georeference maps: QuantumGIS. It allows to stretch a map to match georeferenced places on a reference grid. We will trick it, putting as a reference layer the panorama, and as a georeferenced map our historical image. At the end we will retain only the resulting image discarding the georeference metadata.
Launch QuantumGIS, and with Layer/Add Raster Layer load the panorama starting with zoom level 5 (the most detailed one); in this case 5_ViaLagrangeCsoVittorio.jpg. The Coordinate Reference System is not important in this fake georeference, let's choose from the list the 'default' (WGS84 - EPSG:4326).

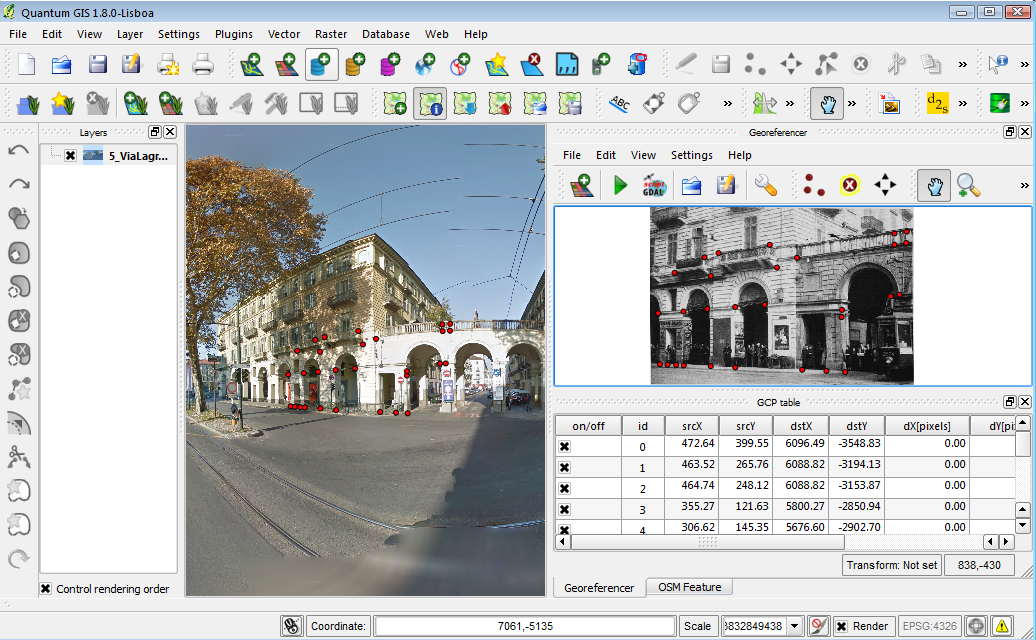
Then start Raster/Georeferencer/Georeferencer, and from the plugin menu File/OpenRaster let's load the image to overlap, using again the coordinate system WGS84:
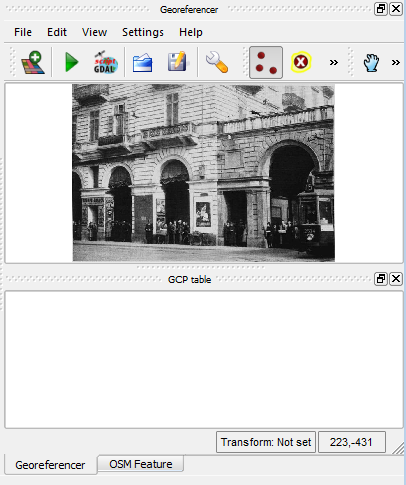
With the zoom keys, or View menu, or the mouse wheel, as in any graphic manipulation software, zoom on an identifiable point common to both images. Select Edit/Add Point (or CTRL/A, or the button with the three red dots); the cursor changes to a cross, and click with care on the chosen point.
A small window will pop up...

And click on the 'From map canvas' button...
The cursor is still a cross; go back on the panorama image, and zoom with the wheel to the same point selected on the historical image; then, with care, click on it.
In the georeferencer window the latitude and longitude will now be 'valid':
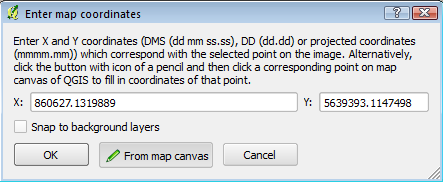
Clicking OK, the first point will be placed on both images.
Let's repeat this sequence, and place as many points we can... if the image is VERY similar to the Google panorama they can be around ten, else MANY more. This is the most tedious task...
When there are enough points, save them (File/Save GCP points as... inside the georeferencer).
Start the transformation. Press the PLAY button (or File/Start Georeferencing). A message will pop up: Please set transformation type. Click OK, and a new window will appear.
Let's choose the following parameters (the Polynomial 3 algorythm is the best for me, because it tries to deform the whole area without creating artifacts; the Lanczos resampling is better for B/W images because it enhances the contrast of the resampled area). We will use as target SRS the usual coordinate system WGS84 (in this environment known only as EPSG:4326):
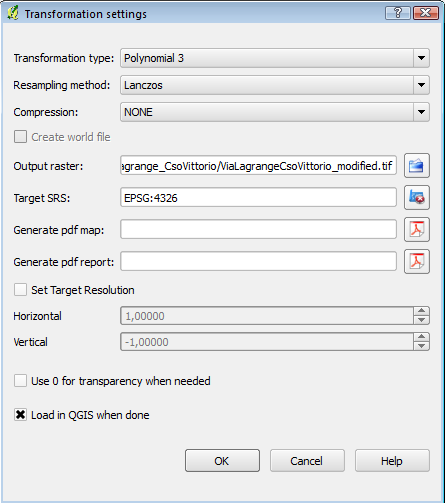
Click ok; the resulting 'georeferenced' image (output raster) in this case will be ViaLagrangeCsoVittorio_modified.tif; save it where you want (better in the same folder as the panoramas... just for tidiness).
As you can see in QGIS, even before the manipulation using GIMP, the result is acceptable, spending no more than 10 minutes to place the reference points.

Save the QGIS project (File/Save project) in the same directory, and exit.
LAUNCH GIMP...
From File/Open, load the geotiff file (in this case "ViaLagrangeCsoVittorio_modified.tif")
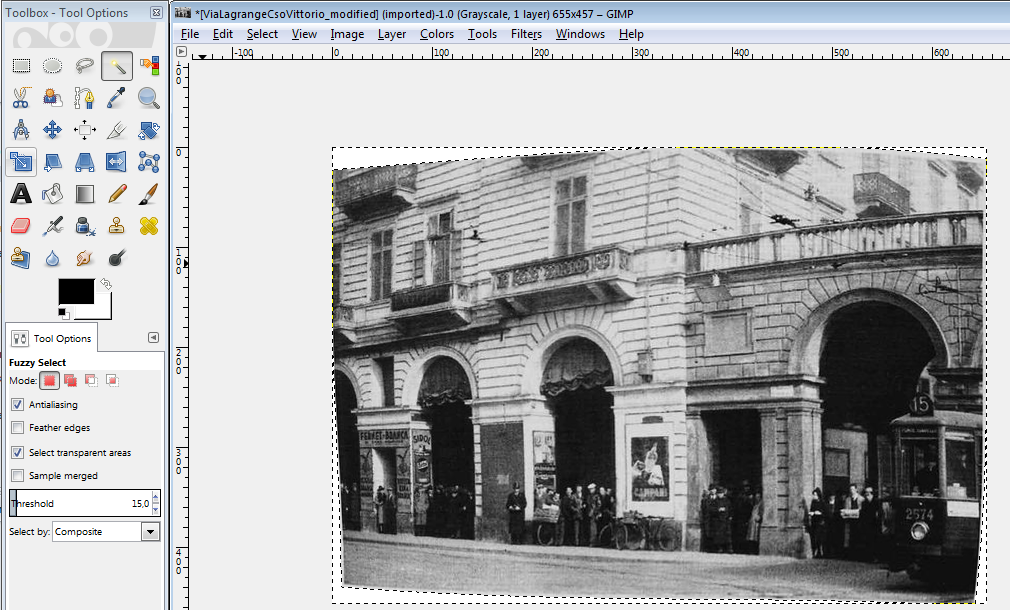
With right click on the image layer, select 'Add Alpha Channel', to enable the transparency of the areas we will delete (in this case the black borders):
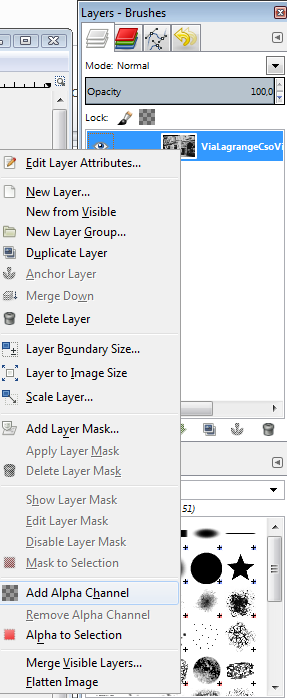
Select the 'MagicWand' tool, and after clicking on the black borders, delete them with the DEL key. They will become transparent (white during the following import; we will decide later if we want to remove them from the final image)
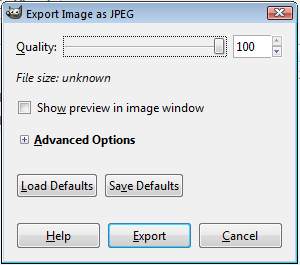
From File/Export, save the resulting image in .jpg format. This way we are also discarding the georeference metadata present in the .tif object.
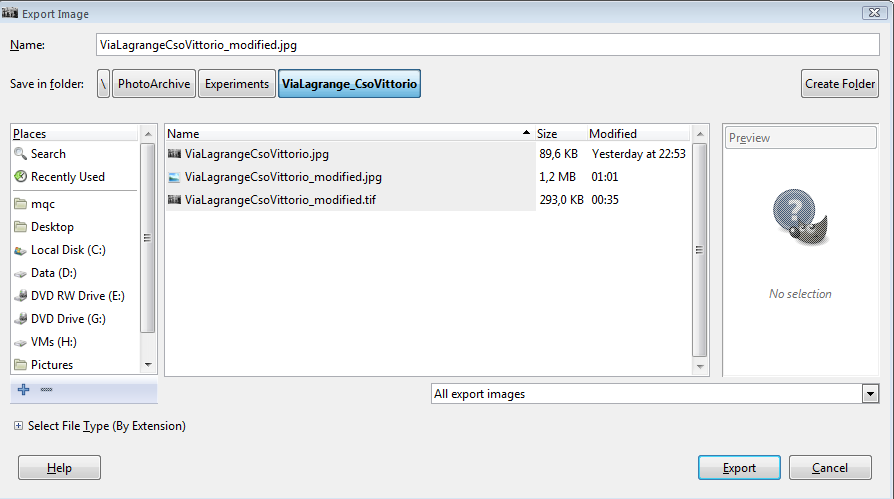
Remember to set at 100% the export quality!
Click Export; then from File/Close All, close everything; don't save the .tif file (we will not use it any more).
--- " OVERLAP WITH GIMP " ---
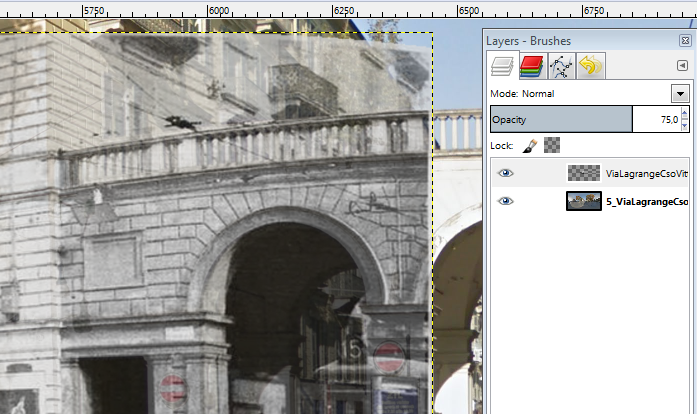
From File/Open, load the panorama file (zoom level 5, 5_ViaLagrangeCsoVittorio.jpg).
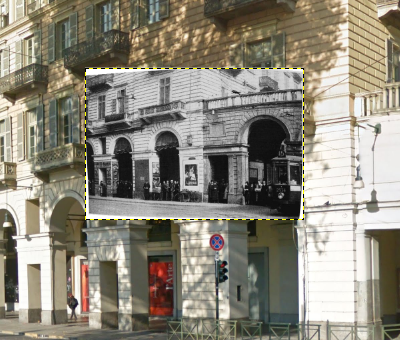
Zoom on the relevant area. Then, from File/Open As Layers, load the .jpg image resulted from the operations in QuantumGIS: (ViaLagrangeCsoVittorio_modified.jpg) :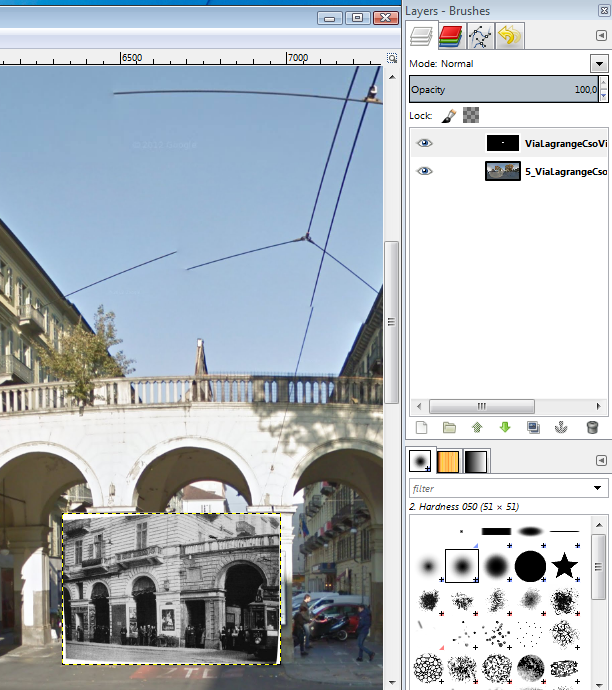
Select the Move tool (the cross-shaped one):
and move the layer so that it is positioned more or less on the area to overlap:
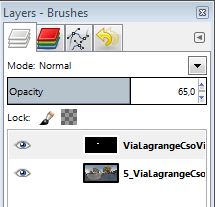
Click on its layer, and set Opacity around 65%
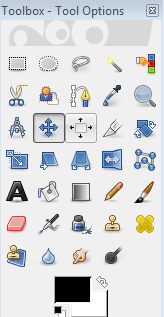
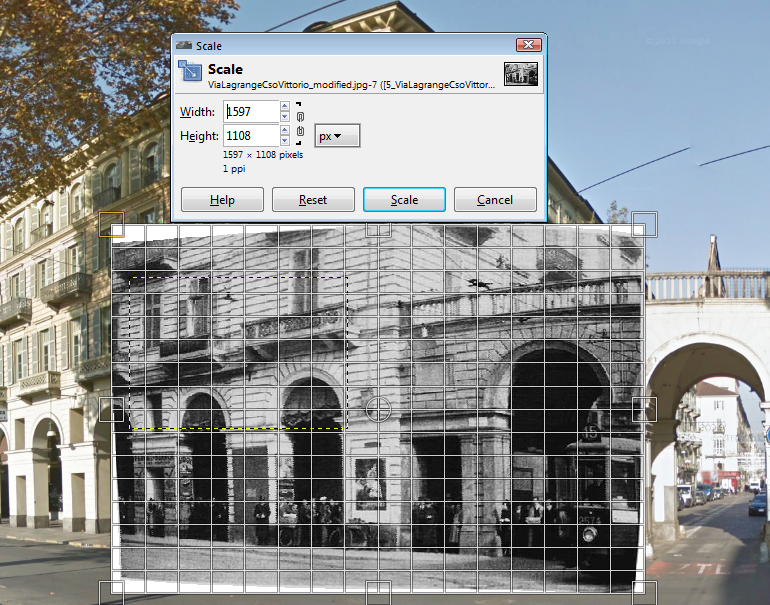
Select the Scale tool:

Taking the image by its edges, resize the layer so that it perfectly overlaps to the Google Panorama; you will find useful to alternate the Scale and Move tools, to position it correctly. The annoying thing is that Gimp sets the layer opacity to 100% while scaling... so the operation is a bit tricky, and requires some practice to be done correctly at the first try. (hints: look only at the borders to join the images, frequently click 'scale' and fine tune the resizing in multiple iterations, until the images merge seamlessly)
Confirm with the Scale button, and then set the Opacity to the best-looking level; if desired, add to the layer an alpha channel as before, and delete the white borders with the MagicWand tool. They will become truly transparent.
From File/Save, save the project.
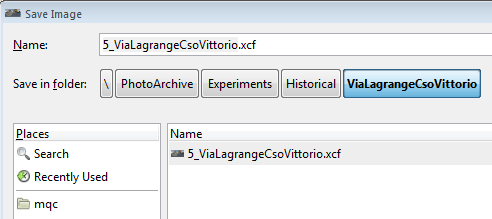
From File/Export, save the resulting image (remember to set quality at 100%), overwriting the original file (5_ViaLagrangeCsoVittorio.jpg - If you do not feel comfortable, copy the original panoramas in a safe location first).
The result should be something like this:
REPEAT THE WHOLE "OVERLAP WITH GIMP" SECTION USING ZOOM LEVEL 4 AND 3 PANORAMAS (in this case 4_ViaLagrangeCsoVittorio.jpg e 3_ViaLagrangeCsoVittorio.jpg)
Level 3 will be the most difficult one, because the image is very grainy at the GIMP zoom required to overlap.
(PS - The panoramas are all different, sometimes with black bands - it is normal.)
__________________
FASE 3
Now we have to slice the modified panoramas again in tiles... we will do it using StreetTileMagick.exe
If the program has been closed, the basic data must be inserted again:
Click the PutPanorama button, and wait for the 'DONE.' message (there will be also a long debug string shown in the dialog... just ignore it, it is not an error!).
__________________
STEP 4
Launch the previously extracted ''MQCTimeMachine.html" (or right click on it and "open with" Chrome, if Chrome is not (yet!) your favourite browser):
An empty page with a 'select' button in the top left corner will appear:
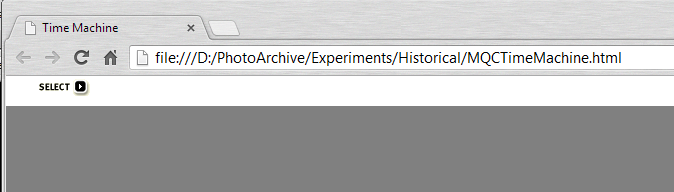
Clicking on 'Select', a dialog will allow to select the index file (in this case index.txt):
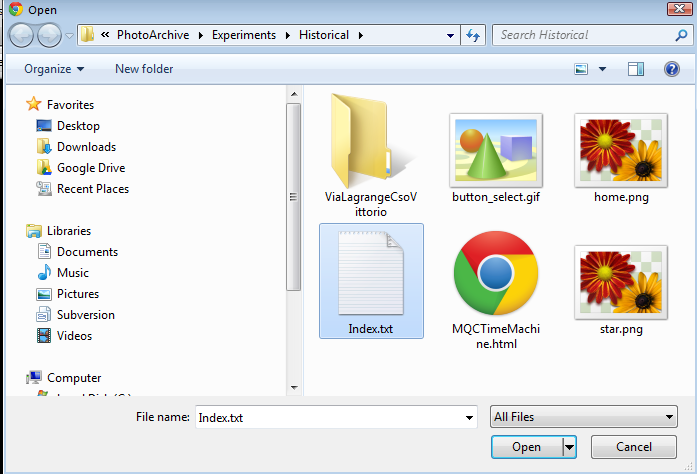
Selecting the index and clicking on the 'Open' button, the page will show a sort of Google Street View page; it has been 'rebuilt' using javascript and Google APIs 3.0. On the bottom right corner you will see a small 2d map.
Inside the 2d map, if you zoom with the mouse wheel, you will see the markers of all your modified panoramas (if present in the index file). In this case there will be only one.
With the button in the top right corner, you can enlarge and reduce the 2d map.
The initial position of the maps will alway be the one of the FIRST marker present in the index file.
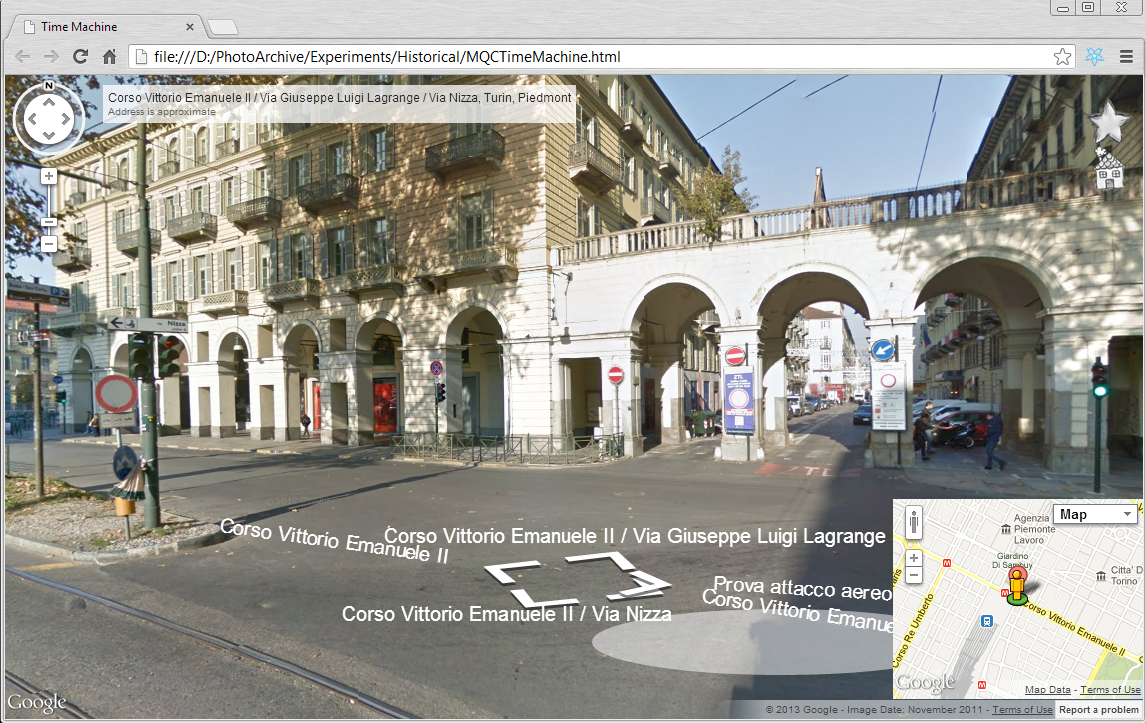
In the previous image, you can see that in this complex crossing there is a 'new' link: 'Prova attacco aereo' ('air raid training' in English), that is the previously inserted 'Link String'.
[At the moment its direction is not well defined... :-/ (see the 'TODO' list at the end of this page...)]
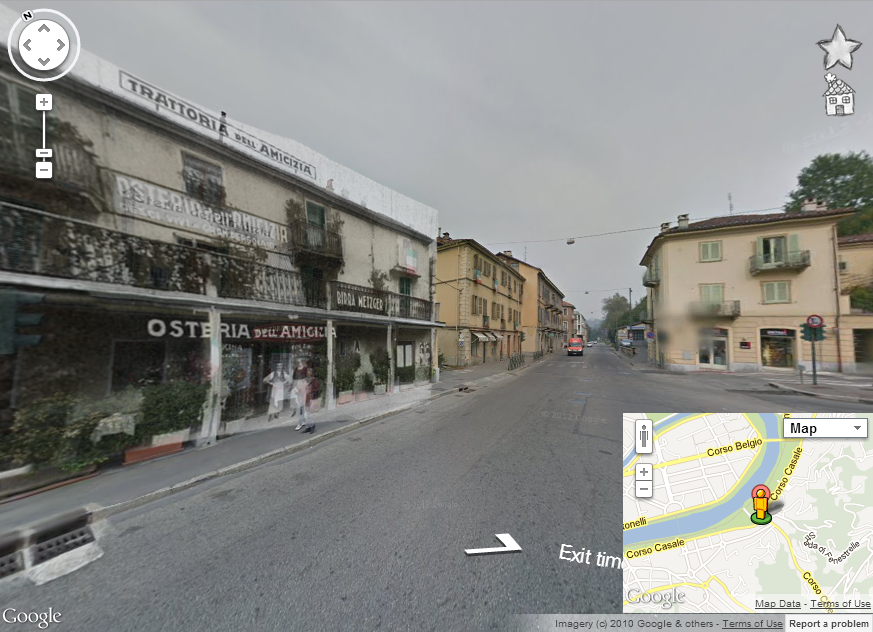
Clicking on it, you will access your modified panorama (with a slight 'jump' - see the 'TODO' list...), behaving EXACTLY as if shot by the Google Car! :
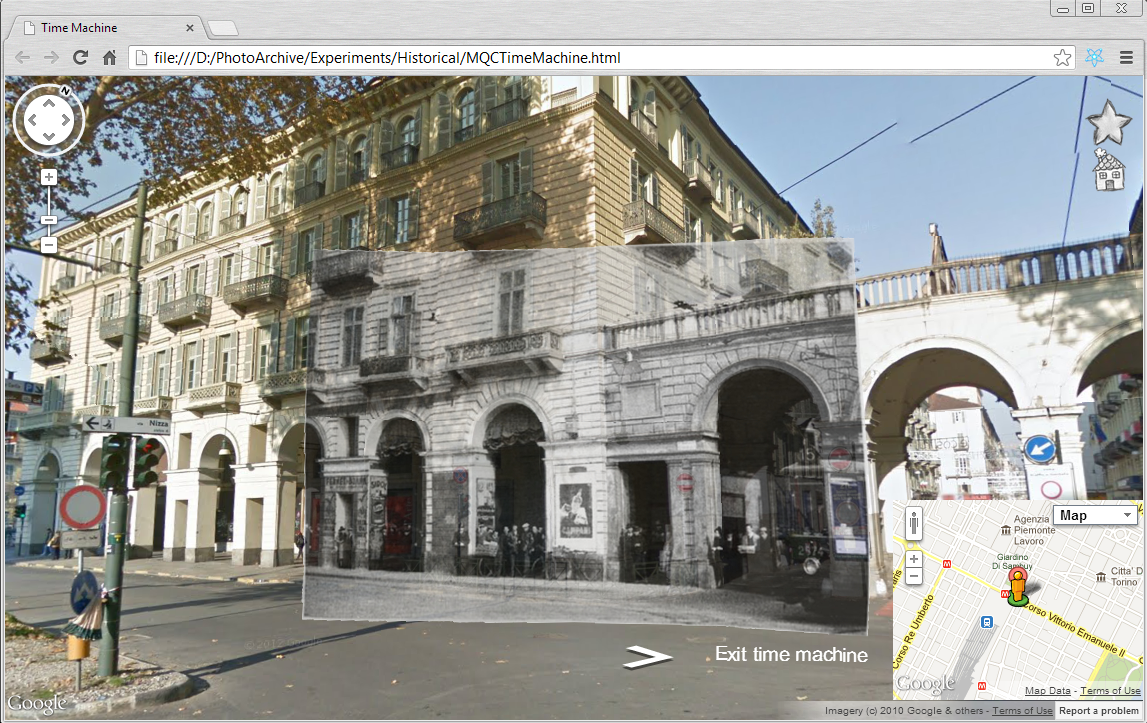
From this point, until you click on 'Exit time machine', the panorama will be completely replaced by the tiles previously regenerated, at any zoom, direction, inclination...
[Of course, to see the 'custom links' and be able to access the modified panoramas, you will have to be 'right on the spot', on its marker. If you navigate away from a modified panorama position, you can use the 2d map to find it again.]
__________________
TODO list :
- Programmatically set the added link direction, and the 'Exit' one
- Avoid the jump in heading when jumping from the Google to the custom panorama and back
- After resizing the 2d map, the 'little man' icon disappears until a move or zoom on the map. To be understood and solved...
- Add an 'address search' field
__________________
[---
DISCLAIMER... not to violate the Google terms of use, the original and custom panoramas and tiles should be available only locally for private and personal use (do not distribute them, or make them publicly available on the Internet). Also for this reason I made the index file only a local one (it's a weak protection, anyway!...).
If, instead of downloading a Google panorama, you create your own and then generate the tiles accordingly, you can do anything you want of the tiles and panorama using the Google APIs... you can even make a site with them! This will probably be the subject of another small tutorial like this one... :-)
---]
As usual, I am available for any suggestion/request/bug report/bug fix, etc...
Have a pleasant navigation!!!
__________________
PS - Technical notes:
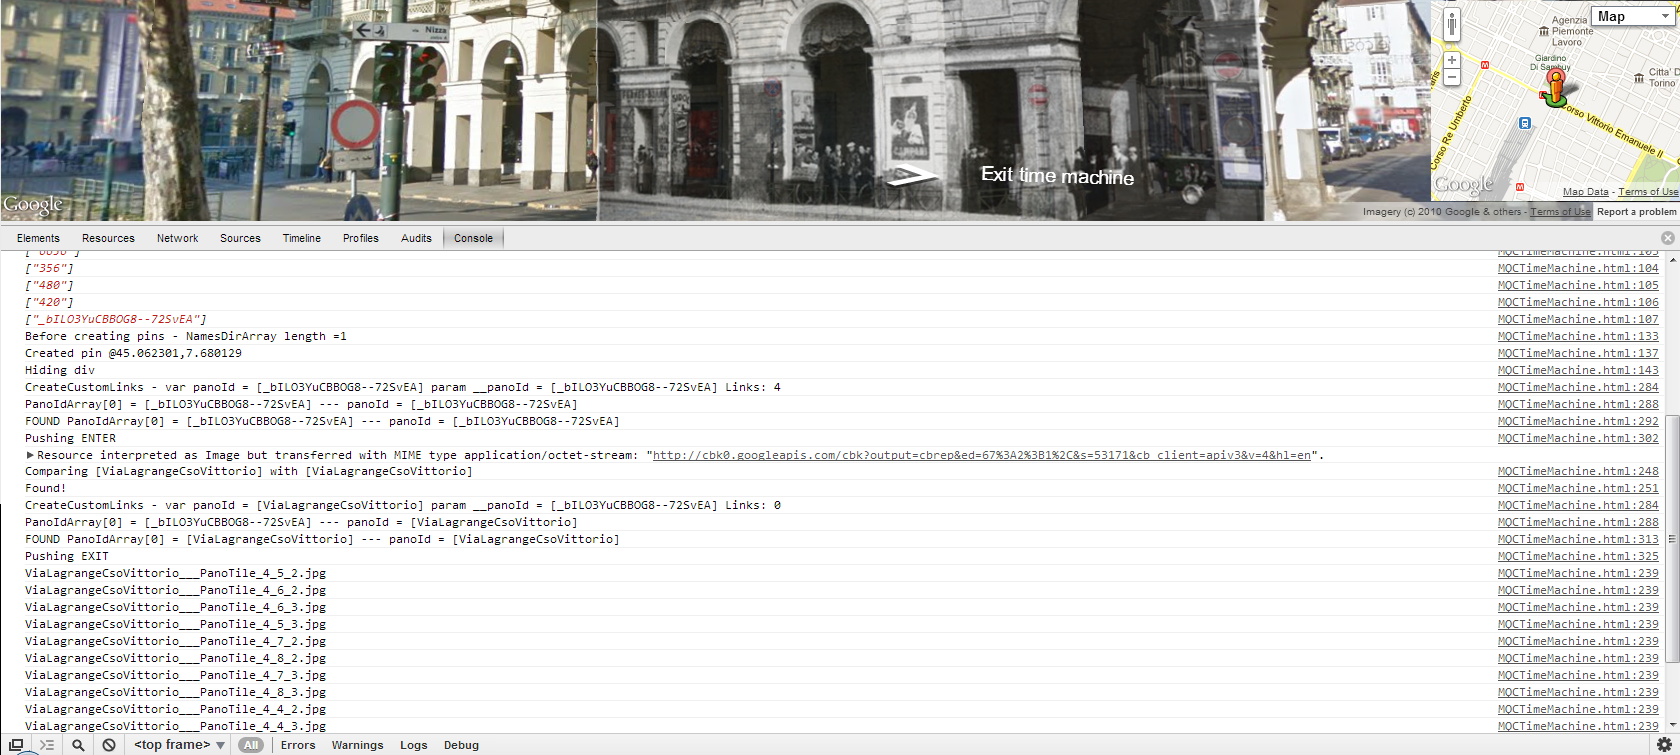
1) I left (commented out) in the javascript sections of the html page some debug messages (output shown in the Chrome Java Console); if you feel inclined to, you can uncomment them to look at the program flow... and in case of exotic behaviours, they may be useful to me to understand what is going on.
2) The index file format:
For each panorama, the FIRST row is the comment
The SECOND one is the Google URI copied from the link field in Google Maps
The THIRD one (the only one relevant to the program, identified by the starting '@') contains the following parameters:
Directory
Latitude
Longitude
Link String
Tiles X size in pixels
Tiles Y size in pixels
Panorama X size in pixels (zoom level 5)
Panorama Y size in pixels (zoom level 5)
Heading (degrees)
'Enter' link direction (degrees)
'Exit' link direction (degrees)
Google PanoID
